 North Star Gate
 Filling Bird
Before you begin
Location and Motion & Fitness access support walking detection. Background recording depends on your location settings. Camera and photo access are used when you add pictures; optional sync uses NSG ID.
Record your first walk
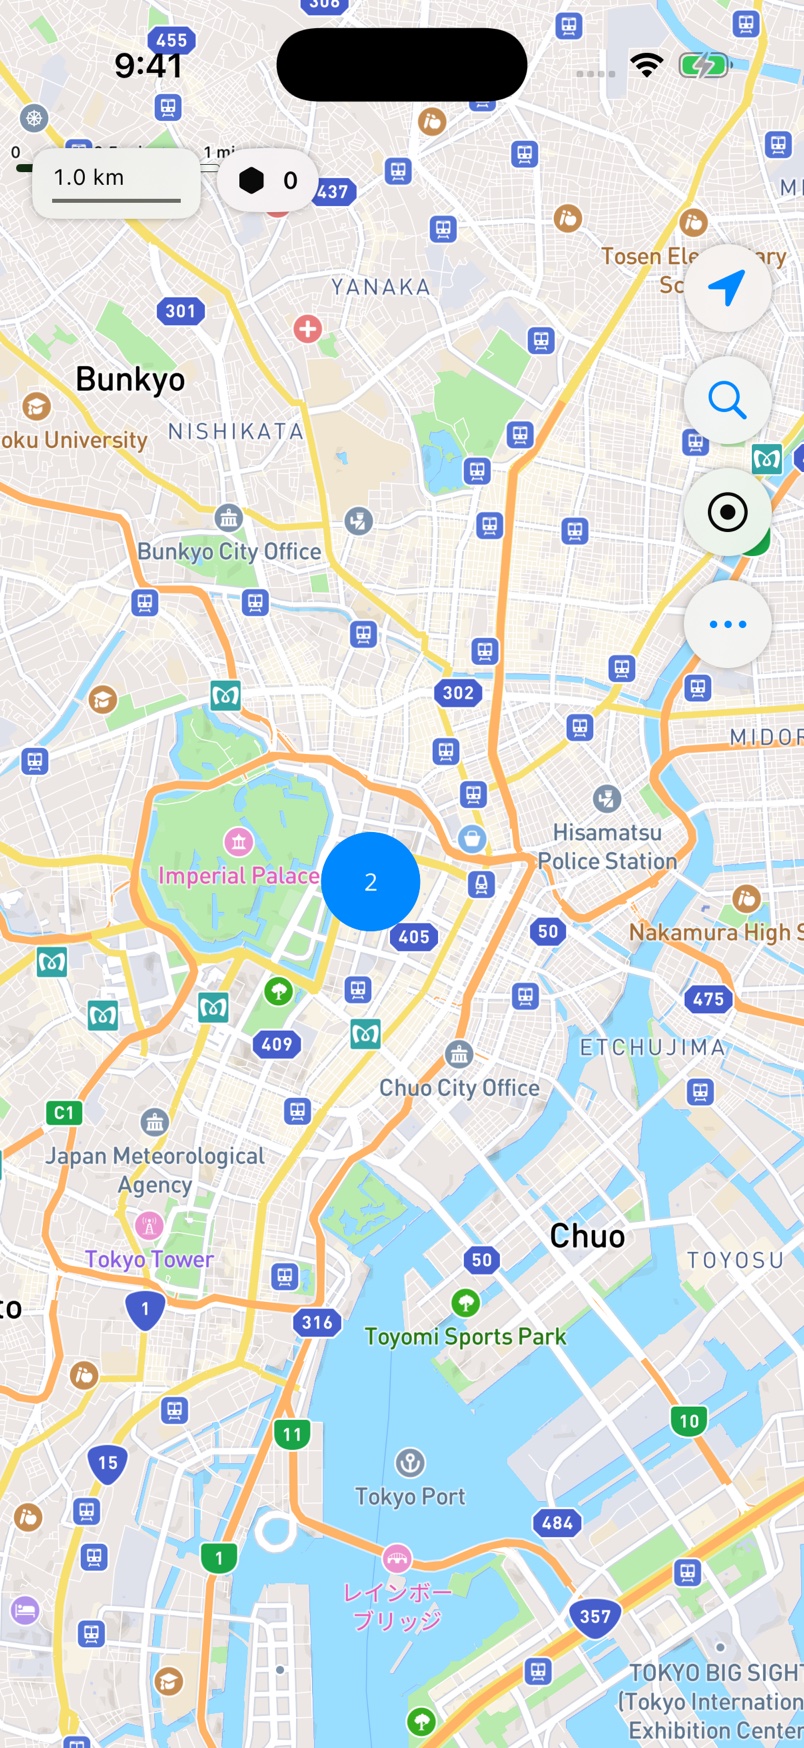
- Open Filling Bird to the main map. An account is not required.
- Allow location access if the permission prompt appears.
- Allow Motion & Fitness access if requested so walking can be recognized.
- Tap the circular record control above the three-dot control. Its accessibility label is Start Recording.
- Walk outdoors with the iPhone.
- Tap the red Stop Recording control when you finish.
What to expect. new hexagons appear on the map. Detection can be delayed while motion history is confirmed; standing still or driving does not earn walking progress.
Review places, badges, and history
- On the main map after a walk, tap the upper-left hexagon count (Hexagon Stats).
- Choose Badges in Activity Profile to see achievements.
- Choose Statistics to review activity totals.
- Choose History to see daily hexagons and available step counts.
- Tap Close to return to the map.
- Tap the three-dot control to show more tools.
- Tap the globe control to open the visited-area map.
What to expect. Activity Profile shows your recorded progress. Visited-area colors are shown on the separate World Map, not on the main street map. Enable sync for server leaderboards.
Understand the area you have claimed
- On the main map, tap Start Recording before walking.
- Walk a connected route; three or more connected claimed cells can form a territory.
- Continue around a loop to enclose an interior area. Gaps in claimed cells can leave the loop open.
- Tap Stop Recording when your walk is finished.
- Tap the upper-left hexagon count to open Activity Profile.
- Choose Badges to review territory-related progress.
What to expect. territory progress is measured by geographic area. Hexagon count and territory area are different measures; walking every interior cell is not required.
Join a team and choose what to share
- Starting on the main map, tap the upper-left hexagon count to open Activity Profile.
- Choose Team.
- Choose Team List.
- Enter the team name in the search field.
- Tap Search.
- Tap Request to Join beside the intended team. Sign-in is required; complete the NSG ID screen if prompted.
- Wait for a team owner to approve the request.
- Choose My Team after approval.
- For individual sharing, turn off Share all historical and future territory.
- Under Territories to share, select the territories you want to contribute.
What to expect. selected territories show as shared. Private contributions that expand territory formed by sharing members may also be disclosed to the team. Turning off all-history sharing is not a guarantee that every contribution becomes private. Individual selections may need review when territories change.
Save a restaurant, park, or other place
- On the main map, long-press the place you want to save to open Register Location.
- Enter a name.
- Optionally enter a description.
- Optionally choose a Category.
- Tap Save.
- Tap the new saved marker to open Location Details.
What to expect. the place appears as a saved marker. If it is hidden, check your category filter. Deleting a place requires confirmation; use Cancel if unsure.
Sync or restore your record
- On the main map, tap the three-dot control to show more tools.
- Tap the gear control to open Settings.
- Under Server Sync, turn on Enable Server Sync.
- Tap Continue with NSG ID if you are not already signed in.
- Complete sign-in with the account whose data you want to use.
- Tap Sync Now when available.
- On another iPhone, repeat these steps with the same NSG ID account to retrieve server-saved records.
What to expect. the account and updated last-sync time are shown. Offline changes wait for connectivity. Turning sync off stops future progress syncing but does not delete server data. Log Out removes synchronized server-backed data from this device while keeping never-synchronized records; do not use logout as a first troubleshooting step.
If something goes wrong
No new hexagons?
Check location and Motion & Fitness permissions, start recording, and walk outdoors. Progress can appear after motion history is confirmed.
Sync needs attention?
Check your connection and use Settings → Sync Now. Avoid logging out as a first troubleshooting step: logout removes synchronized server-backed data from this device.
Need help?
Include the app version, the time of the issue, and what you expected to see. Do not include private routes or account details unless needed.
Map settings and permissions
From the main map, open the three-dot control, then Settings. Track Recording → Track Boundaries offers Disabled or All Layers. Map Display changes the current-location marker and color. Manage location and Motion & Fitness access in iOS Settings. Camera and photo access are needed only when adding pictures.
Need a diagnostic log?
Settings → Diagnostics → Enable Detailed File Logging records details for support. Reproduce the issue, then open View Current Log File. Signed-in runtime logs may upload automatically, independently of progress sync. Preserve the log before using Reset Current Log File.
Need to check in or add photos?
Open a saved marker to Location Details. Check In Now adds a visit. Check In with Photo opens the photo check-in flow. Add from Library or Camera adds photos; allow the requested access.
Contact North Star Gate
Include the app version, device model, iOS version, what you tried, and the error shown. Review screenshots and logs for personal information before sharing them.
